
The LTI 1.3 Deep Linking workflow is preferred to facilitate seamless addition of Turnitin assignments into the underlying platform. In the example below, depicting a basic LMS/platform layout, the workflow shown is the optimal way that the Turnitin LTI tool should be implemented and launched.
Instructor Workflow
The instructor workflow should be a Deep Linking flow from the platform's course/context area as described below and not an 'add-on' to an existing workflow. Ideally, there should be a separate “create Turnitin assignment” button or function from within the platform course or equivalent. This is to reduce the number of clicks for a user to set up an assignment.
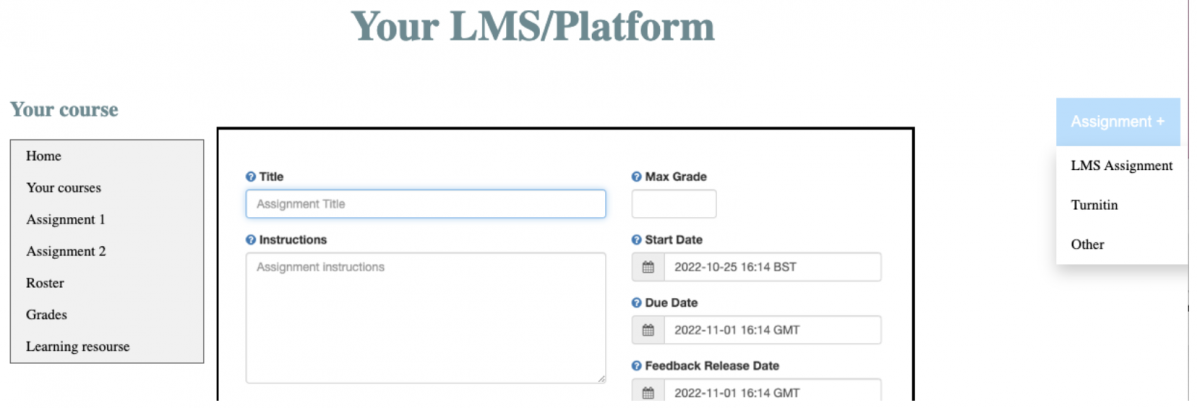
1. In the context area or course, the Turnitin assignment needs to be added directly. In this example, there is an assignment option which allows for different assignment types to be added. One of these is for the Turnitin LTI 1.3 assignment link.

2. When the Turnitin option has been selected, the LTI Deep Linking launch will be sent and the Turnitin assignment creation flow will preferably appear in an iframe (the inbox can also be loaded in a new window if the platform settings allow). The user will fill in the details of the assignment such as title (Assignment 3) and directions as well as set the dates, max grade and other optional Turnitin assignment settings.
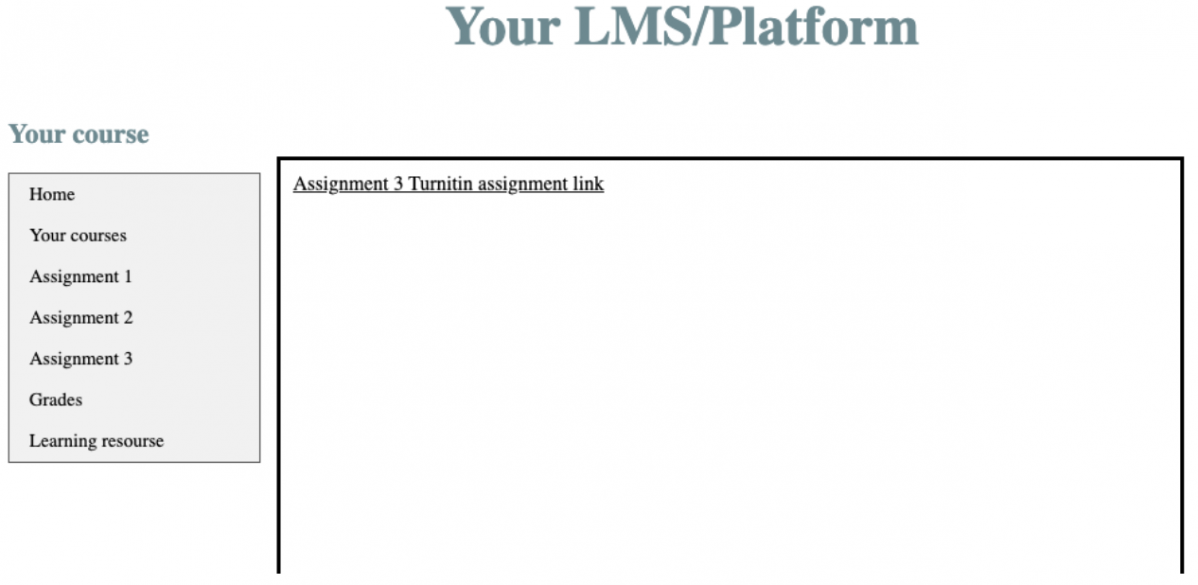
3. Once the user has saved the assignment settings, there should be a link created using the title given to the assignment. This link will be placed within a context/course area. In this case, a new link called ‘Assignment 3’ has been added to the course navigation panel.
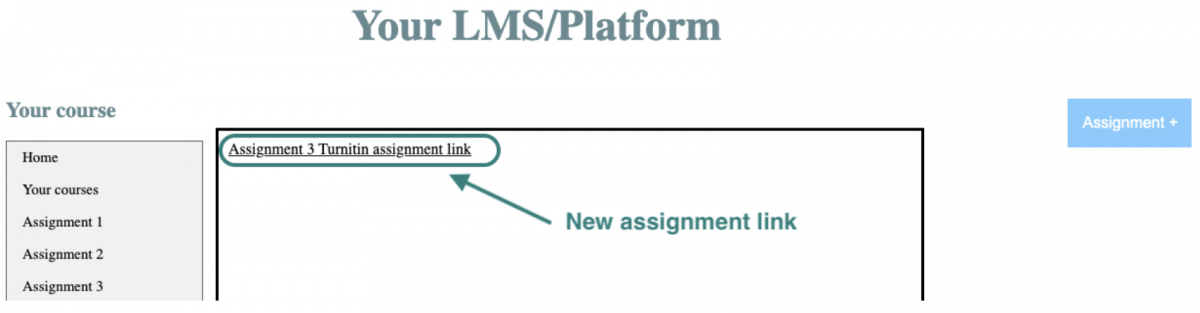
4. When this link is clicked, the Turnitin inbox will load in the page (or in a new window).
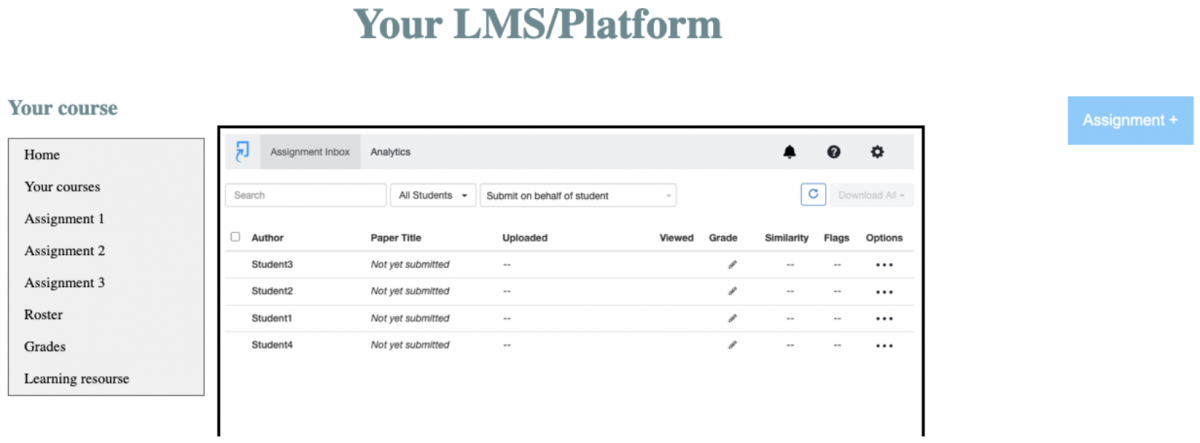
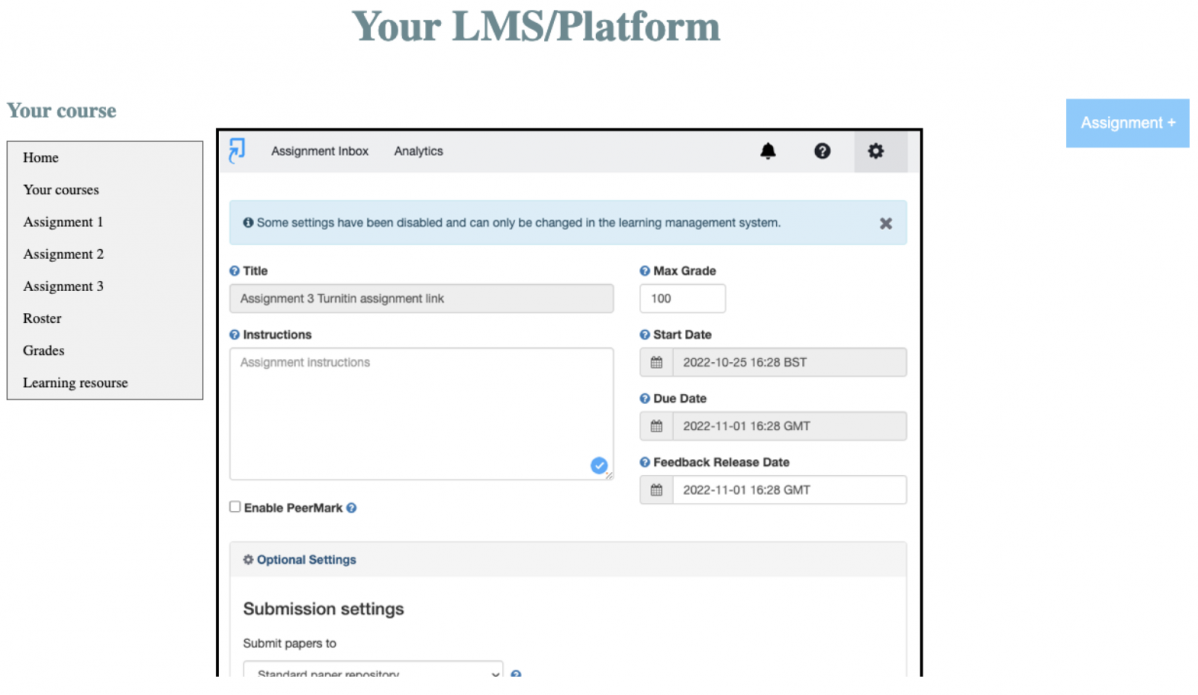
5. Within the Turnitin assignment inbox the assignment settings can be edited and updated by clicking the settings cog. Note that if the dates are to be edited via an assignment, gradebook etc. in the platform, these settings will be locked for editing in the Turnitin inbox.
Student Workflow
1. The student should see a link to launch the LTI assignment on the course/context where they are enrolled.
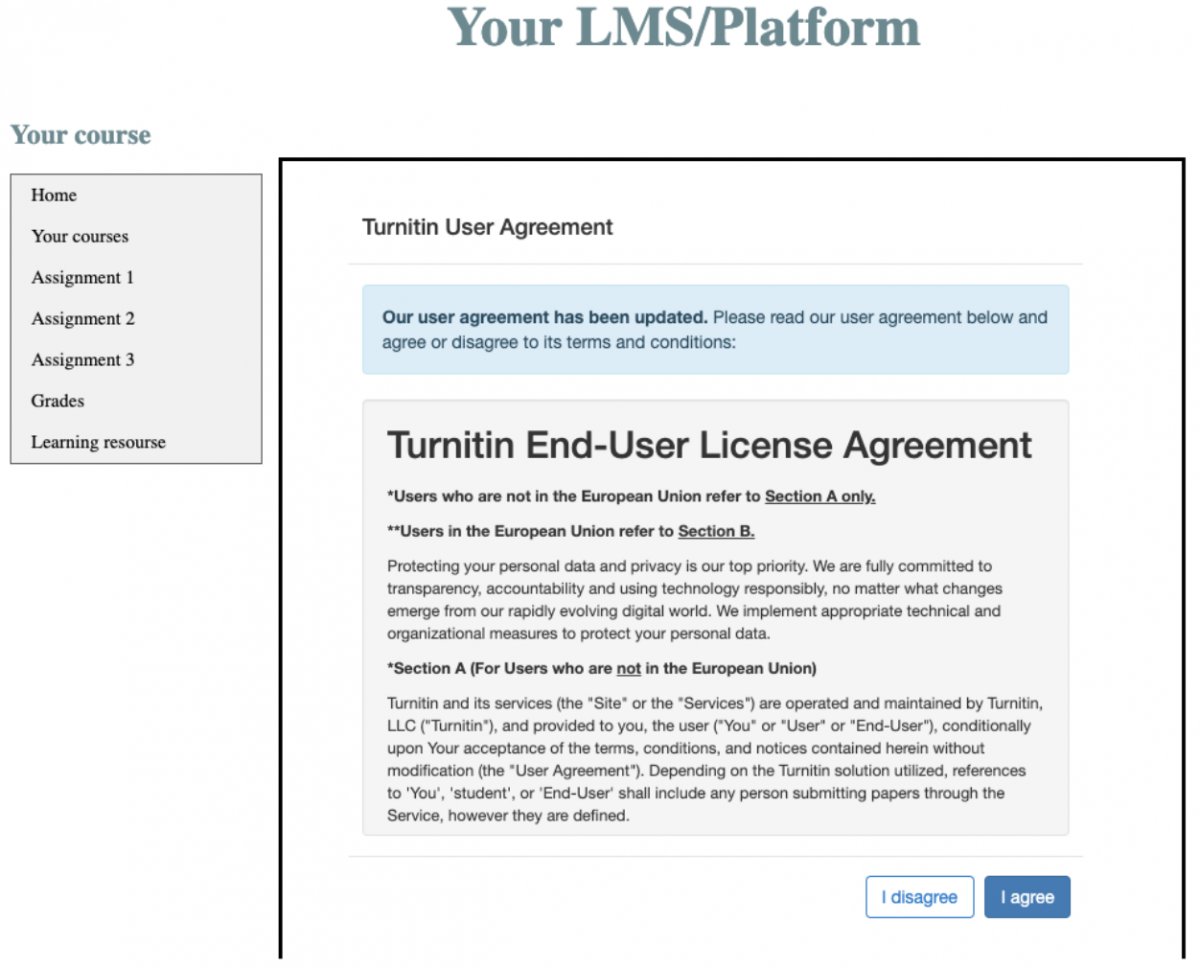
2. When a student uses Turnitin for the first time, they should see the Turnitin EULA display which they will need to accept before continuing. This only ever happens on the first occasion a new user accesses Turnitin, or in the very rare case the EULA is updated.
3. Once the student has accepted the EULA they should be presented with an upload submission button. In the case that the EULA has been previously accepted the upload button should appear automatically at the point of launching the assignment link.
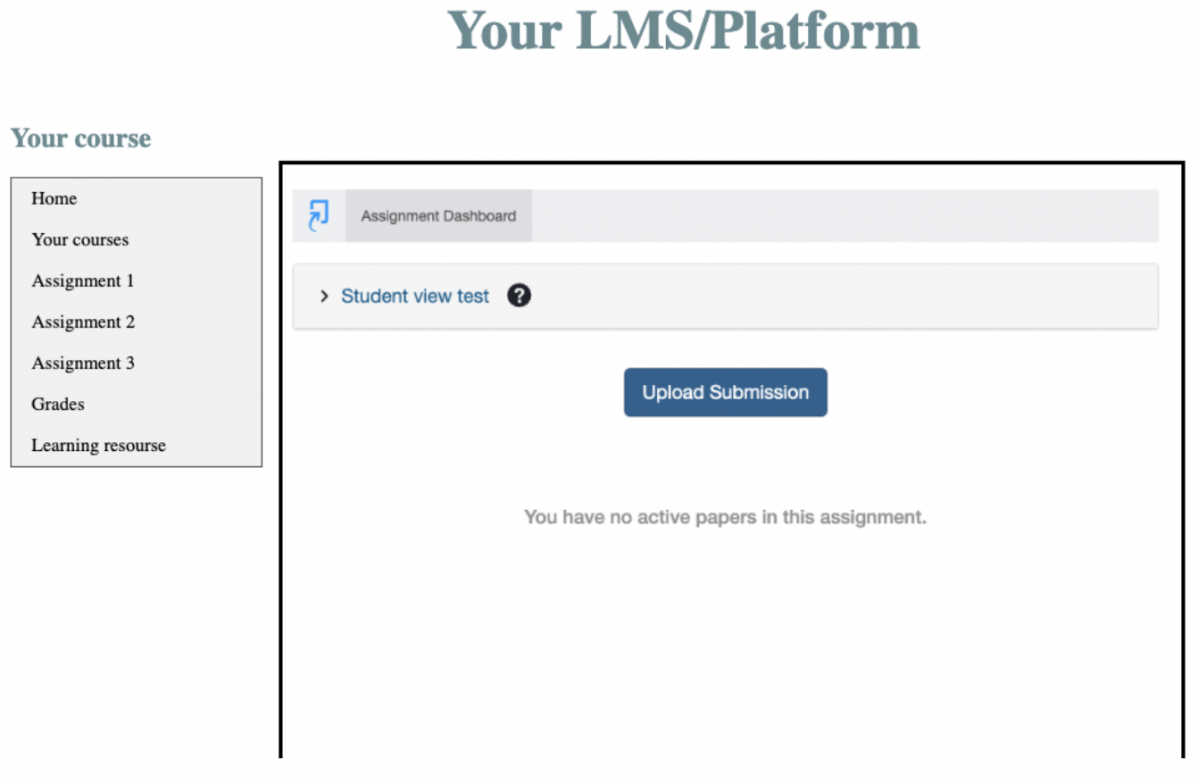
4. Clicking the Upload Submission button will provide the student with various upload options.
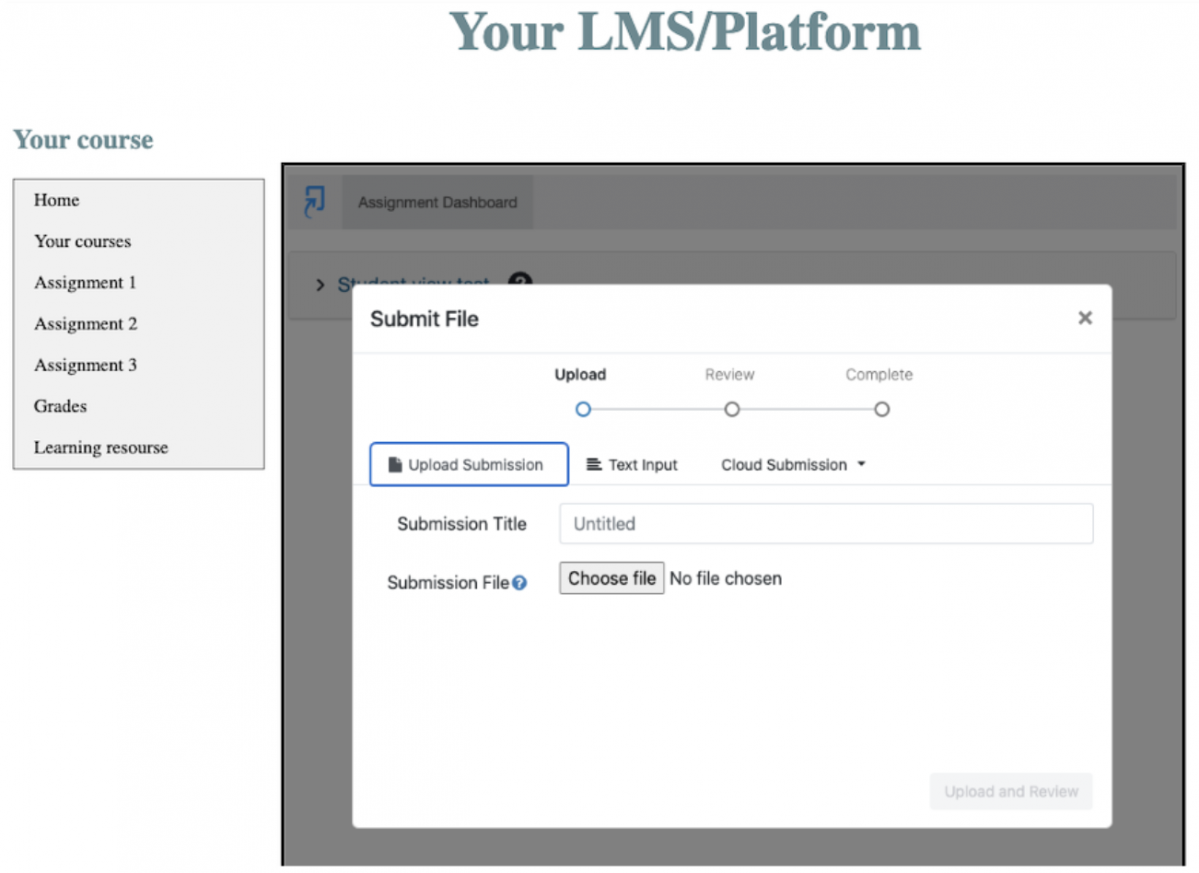
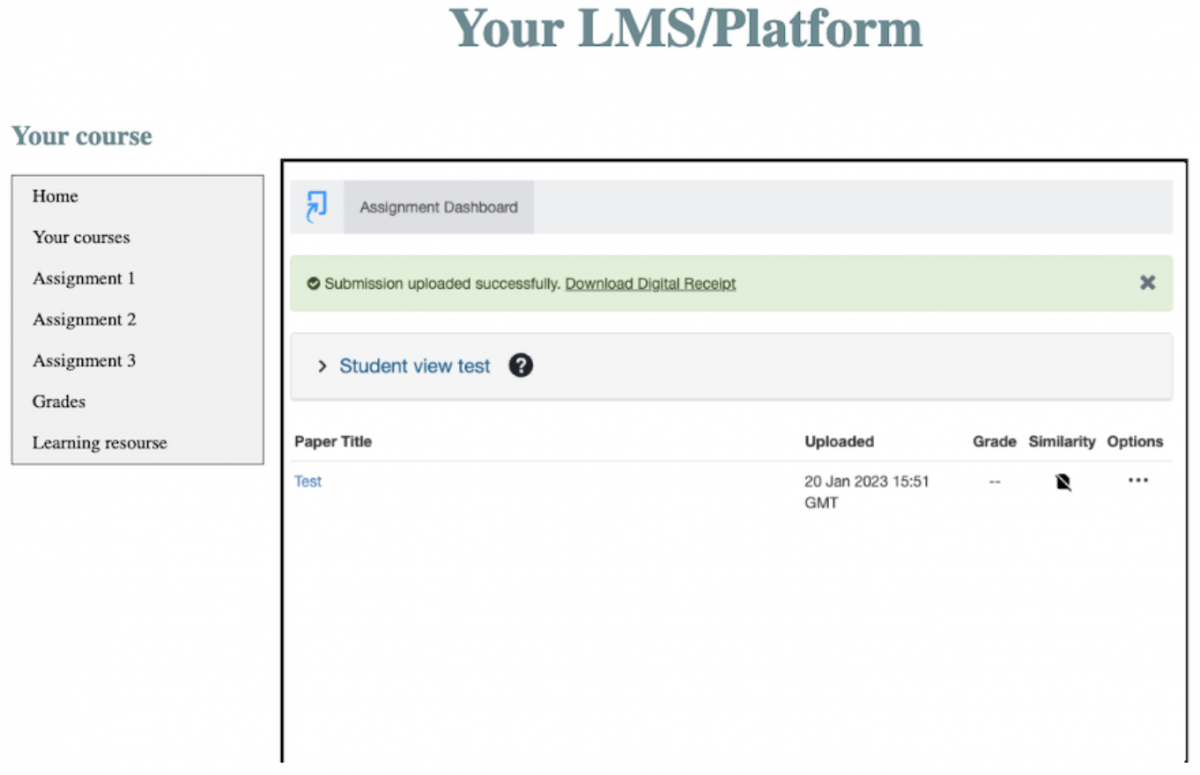
5. After submitting, the student is shown a successful upload message and they are redirected back to the Assignment Dashboard.
Grading Workflow
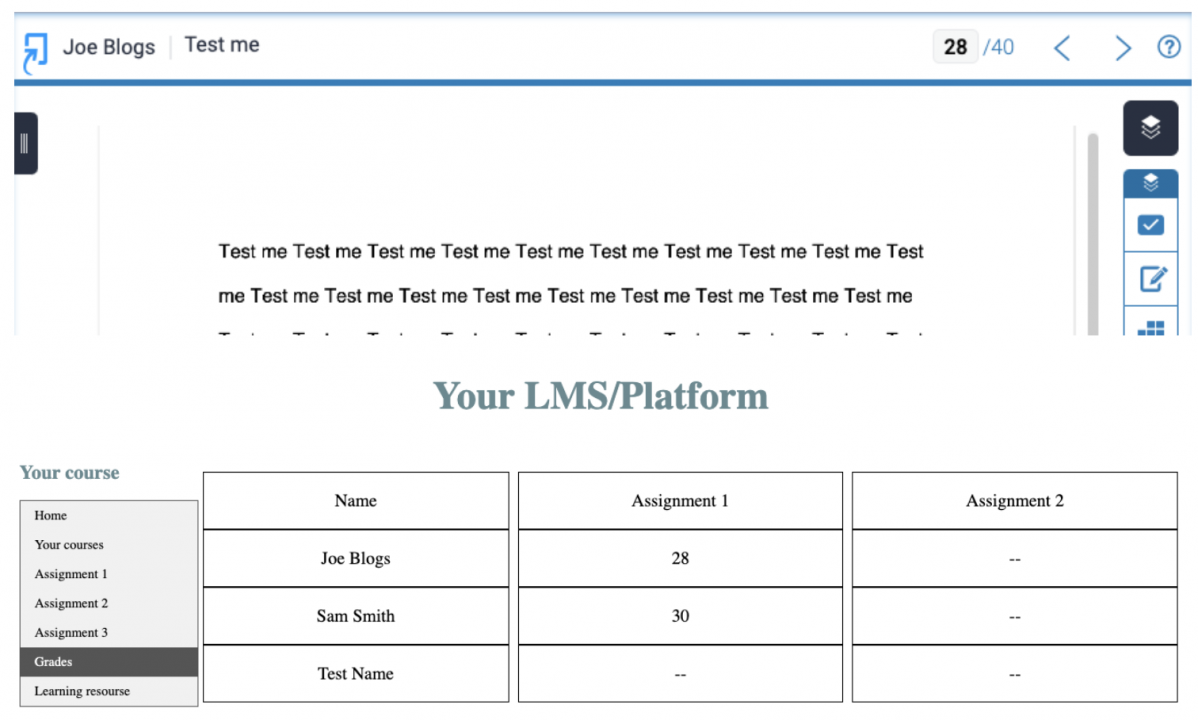
The grade awarded to a student's submission within Turnitin should be passed to the platform gradebook area, as part of the LTI Assignment and Grades Services. In the example below a grade of 28 is awarded to a student submission in Turnitin (1st image) and it is then passed back to the platform's gradebook (2nd image).
If your platform uses assignment title, start and due dates, and description fields, it should take ownership of any edits for shared settings. These settings are initially sent from Turnitin to the platform as part of the Deep Linking launch, which prevents users from having to update shared settings in multiple locations.
Grades assigned to a paper within Turnitin are to be populated into a platform's gradebook via the Assignment and Grade Services as a lineitem. The platform will support different progress types, which includes requests sent on submission to show a submission has happened. It should also, (preferably) support the grades release flag to allow the Turnitin feedback release date to control when grades are displayed to students.
Roster syncing student and instructor users, which will be added and removed from the Turnitin assignment when changes are made via the platform’s user roster should be facilitated by the implementation of the Names and Role Provisioning Services. This will also provide instructors with the ability to submit on behalf of a student.
A value for user data must be given for the user's email and name, as this is required for user account creation and identifying users.
Registration and Deployment
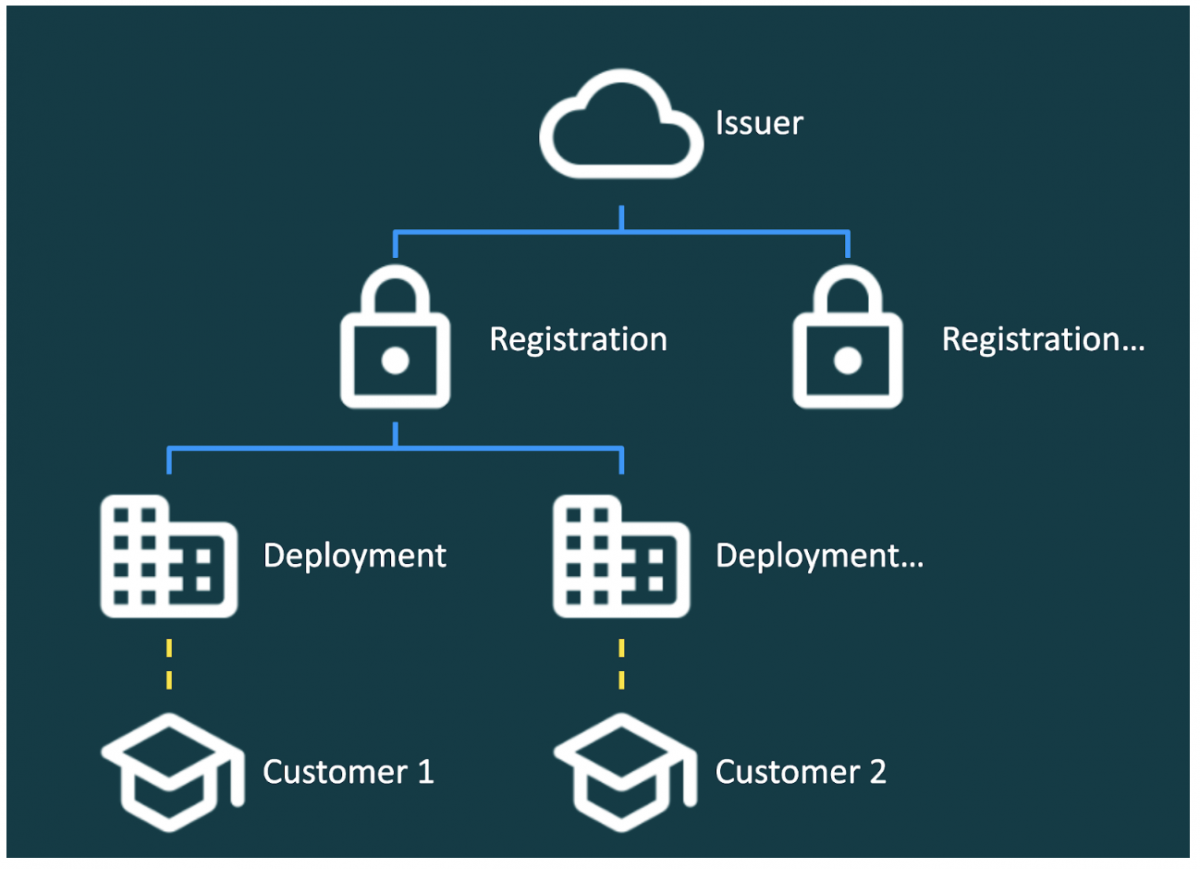
To connect your platform and Turnitin account, a specific registration process is required, which facilitates the passing of credentials for authenticating requests between Turnitin and your platform. The platform is the issuer and can be registered to many different tools, not just Turnitin. The registration with Turnitin can be between a single instance of a platform, or if you are a SaaS platform this can be done over multiple instances of a platform (This is a preferred option for SaaS platform users as it removes the need to complete the full registration process with Turnitin).
Note - the registration will NOT authorize a user to access and use Turnitin, as this is done by the deployment.
When a deployment is created it will be linked to a customer's Turnitin account, the deployment will have a unique id. The link this creates between the customer and the deployment is used to authorize the requests. The process of authoring this link is Out-of-band authentication (OOBA).
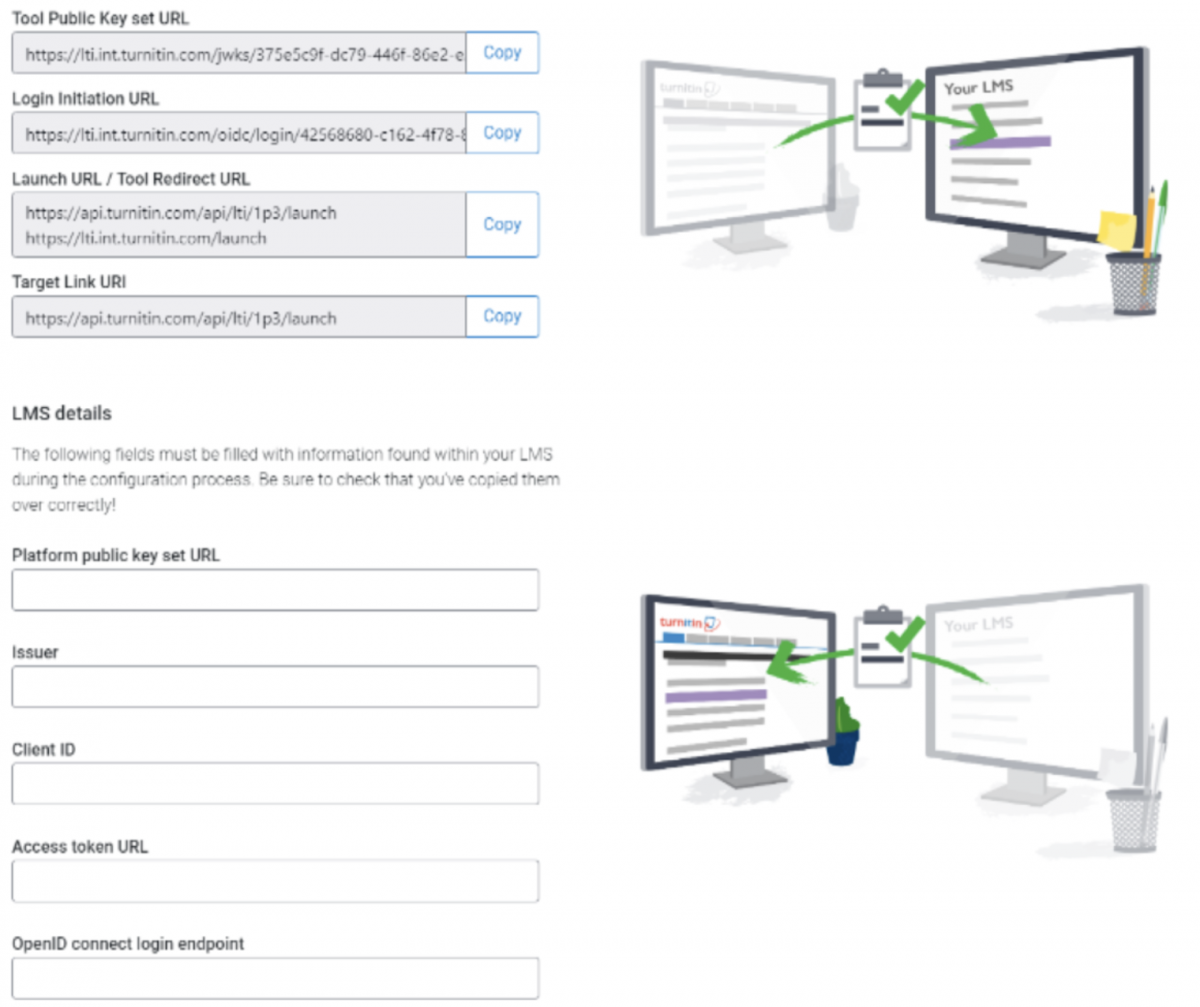
For a user/customer attempting to complete the Registration and Deployment with Turnitin, they will require an active Turnitin administrator account. This will allow the user doing the setup to access the Turnitin LTI configuration page where the below details can be found.
The Turnitin/tool details that must be shared with the platform:
- Tool Public Key set URL
- Login Initiation URL
- Launch URL/Tool Redirect URL
- Target Link URI
The LMS/platform details that are need from the platform:
- Platform public key URL
- Issuer
- Client ID
- Access token URL
- OpenID connect login endpoint
(Note: If you are a SaaS platform and are interested in using a “Global/service/SaaS wide” registration, this can also be discussed as an option.)
Following this initial registration step, all necessary configuration details will now be shared between the platform and Turnitin. At this point, the Turnitin administrator will now need to create a dummy Turnitin assignment on the platform, where they will then be redirected to the login screen, (below) to complete the deployment of the integration. The Turnitin administrator will need to login, so they can be presented with a list of Turnitin accounts where they have administrator permissions. From this list they will need to select the Turnitin account they would like to link to this integration.